makerdad
makerdad
XBee Protocol Design
One of the goals of the self driving rover project has always been to have it controlled by a base “brain” unit that does the actual analysis and motion control. I have a few XBee S1 units I had purchased a long time ago and I wanted to put them to good use for this.
XBees are quite versatile but notoriously hard to configure. There are tons of configuration options available and the XCTU software is not the most friendly.
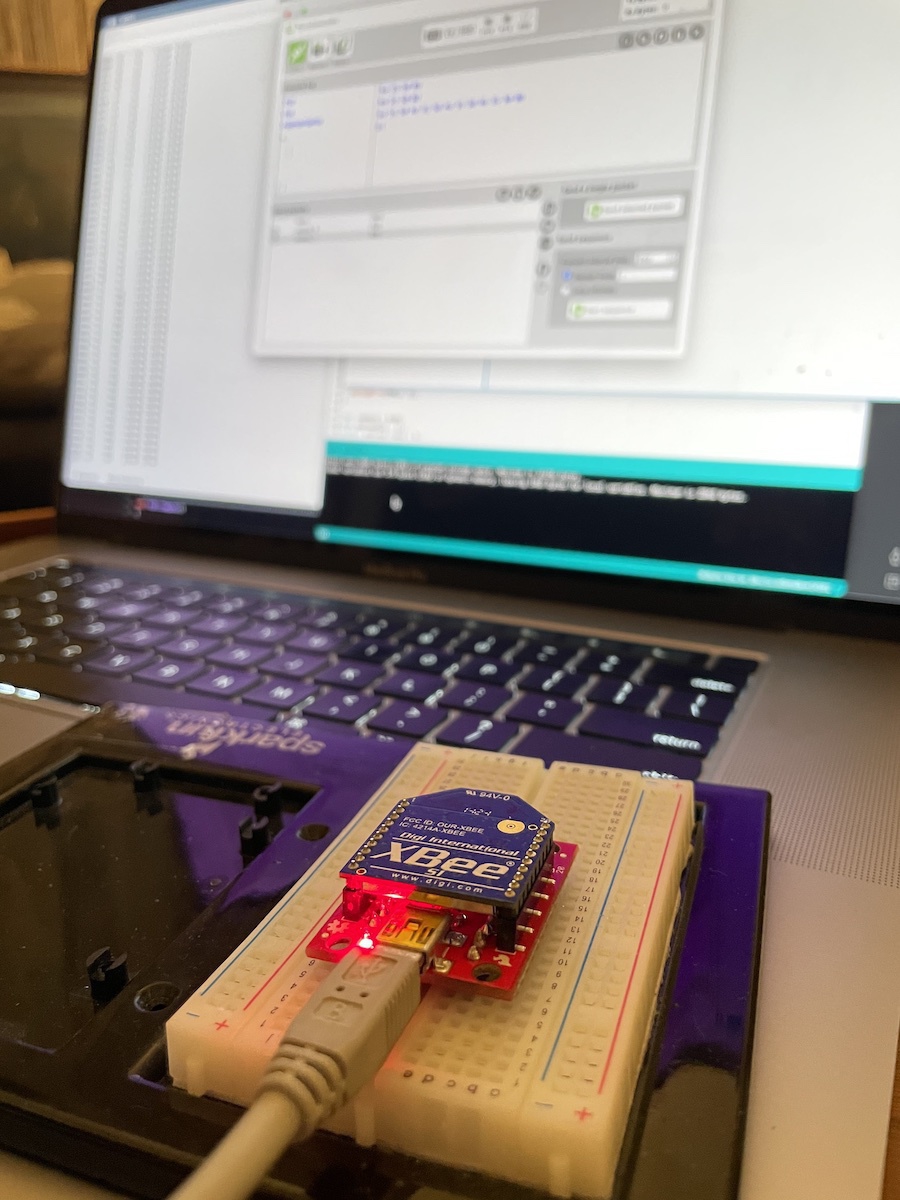
I started out by plugging both XBees to a USB FTDI board and launched XCTU to make sure they are properly visible. After finding them, I reset them to factory settings in case some weird config is lurking in there. Then I configured one as the controller and the other as the end unit. I set the matching address attributes to make sure they could auto-discover each other. There are tons of good articles on this part. This one from Sparkfun and this beginner’s guide to XBee on Atomic Object were very helpful.
Once configured, I hooked up the end unit one to the Arduino. It’s a simple connection, and thanks to the SoftwareSerial library, you don’t have to use the hardware RX/TX ports. Actually it’s recommended that you use this method, since RX/TX might interfere with USB serial communications.
Then I uploaded a very simple sketch on the Arduino. It simply prints out every received byte from the XBee:
while (XBee.available()) {
    char value = XBee.read();

    Serial.println(value);
}
I then went into terminal mode on XCTU and started typing random commands. Output immediately came back through the Arduino to the serial monitor. Things were looking good.
Next step was designing a simple protocol for sending a command and a value. My thinking was that I could get away with three commands:
- Forwards:
F - Backwards:
B - Rotate:
R
Then I could append the value to this. For instance F100 would move 100cm forwards.
Reading from XBee is no different than any other serial interface. However I wanted to ensure full commands were being read without having to enforce a command length. I decided to use byte 0x0D as the end delimiter. This seems to be the carriage return character and keeps the terminal tidy as well (since there is one command per line).
Implementation required me to refresh my C knowledge a bit. I had to figure out how to properly convert an array of char values into an integer and then how to reset the values in that array (memset to the rescue).
Here is the relevant implementation:
const char COMMAND_FORWARDS = 0x46;
const char COMMAND_BACKWARDS = 0x42;
const char COMMAND_ROTATE = 0x52;
const char COMMAND_END = 0x0D;

char command = 0x00;
char payload[5] = {};
uint8_t payload_index = 0;

while (XBee.available()) {
    char value = XBee.read();

    if (value == COMMAND_END) {
      int value = atoi((char *)payload);

      Serial.println(command);
      Serial.println(value);

      display.clearDisplay();
      display.setCursor(0, 0);

      if (command == COMMAND_FORWARDS) {
        display.println(F("Forwards:"));
      } else if (command == COMMAND_BACKWARDS) {
        display.println(F("Backwards:"));
      } else if (command == COMMAND_ROTATE) {
        display.println(F("Rotate:"));
      }

      display.println(value);
      display.display();

      payload_index = 0;
      command = 0x00;

      memset(payload, 0, sizeof(payload));
    } else if (payload_index == 0) {
      command = value;
      payload_index++;
    } else {
      payload[payload_index - 1] = value;
      payload_index++;
    }
}
For good measure I attached a tiny OLED on the rover and had it display the active command. Because why not?
Next step: Attach the new gearboxes (old one is definitely broken) and drive this thing remotely. I will also need to calibrate the encoders to make sure it’s travelling the exact distance I expect.