makerdad
makerdad
Rover Hardware Lessons
As I was putting together the Rover v2, there were quite a few lessons along the way, mostly about hardware. I’ll capture them here for posterity.
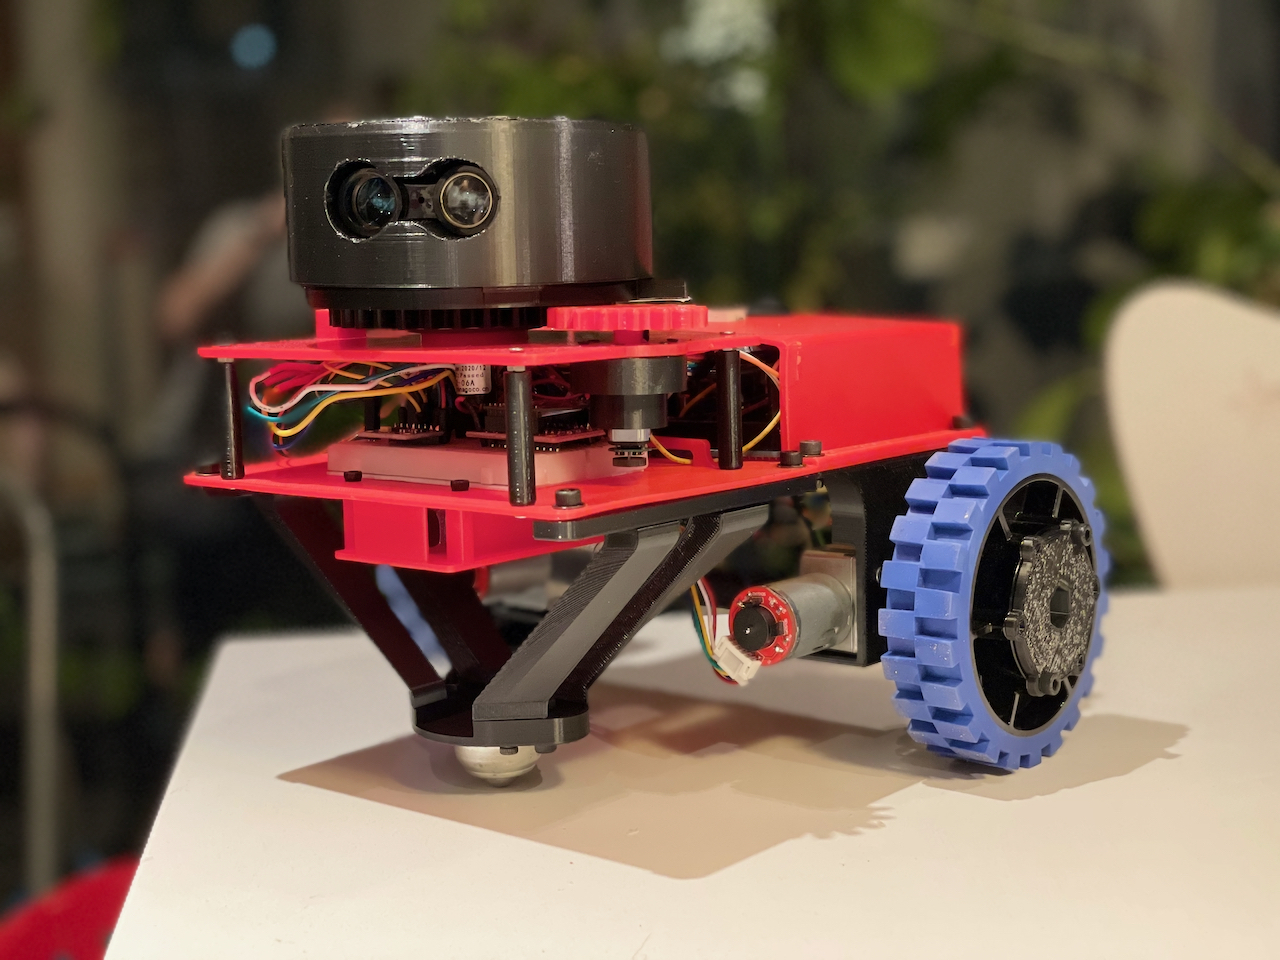
Handling Power Since I have two motors for driving and another for the LIDAR, I had to use two L298N modules, with different input voltages. I already had a voltage booster for the drive motors, getting 7.4v from the LiPo and boosting it to 14v (12v for motors + 2v for the module). I thought I could simply plug in a direct line from the LiPo for the other module, since the LIDAR motor is 6v. In practice this proved to be unreliable. Without a booster, there was a lot of variability in the current and it caused stalling issues with the motor. Once I added a secondary boost to 8v, it started humming along as expected.
Sharing Logic Power L298N modules have a very useful two-pin bridge for allowing battery power to be bucked down to 5v and passed back through to the microcontroller. Problem is having to fit on the little hat to turn this on and off constantly when switching between programming mode (Arduino powered by USB) and mobile driving mode.
I ended up adding a second flip switch to the control panel on the rover to make this easy. Now I can flip between mobile vs. plugged mode at any time.
Preventing Motor Stall I noticed that the LIDAR motor needs an initial power boost to start turning. This meant that the default PWM sometimes wouldn’t be enough to generate the torque needed for the initial move and the motor would get stuck. Solution was actually easy: Start with a higher PWM and slowly bring it down to the desired level. This ensures the motor always turns properly.
Adding PID for LIDAR Motor Since I had quite a bit of experience dealing with PID, adding one for the LIDAR motor was relatively easy. I added a simple delta check to make sure it’s turning at the desired speed. This ensures that the LIDAR can capture scans at a fairly constant rate, and the degree distribution is more even.
Hardware Interrupts Despite using an Arduino Mega, I ran out of hardware interrupts. This is mainly because Mega shares two interrupts with the I2C ports. It’s non-trivial (or probably impossible) to have them work at the same time, so I had to change my port planning a bit. I found the Enable Interrupt library, which also has a great write up about PCINT capability on the Arduinos. I ended up using the A8 and A9 pins for the LIDAR detection, and Enable Interrupt made it really easy to set things up.
One downside: You can’t use Enable Interrupt alongside the excellent Encoder library, it won’t compile. However Enable Interrupt doesn’t have native support for quadrature encoders, so I had to do some more digging on this to make it work with the driving motors. In the end I settled for this Quadrature Encoder library that uses Enable Interrupt under the hood so it plays well together. Unfortunately Quadrature Encoder doesn’t seem to be supported anymore, but it’s only a few lines of code to count the turns properly. So I integrated it directly into the project.
Wheels and Traction I spent a lot of time on experimenting with different wheel configurations (probably too much). The first version had two fixed wheels at the front. This was great for going straight, very stable. Unfortunately making turns was problematic. Front wheels had too much friction and caused the back wheels to spin. This became a big issue since it caused the encoder counts to become very unreliable for odometry.
I then tried a bunch of different configurations, using a single wheel at the front. I tried building a makeshift “landing gear” style wheel, which looked really cool but didn’t work in practice (it would get stuck in weird positions). I also tried making a version of this that had limits on its Z rotation axis. That didn’t improve things either.
In the end I had to settle for a caster wheel. I am still quite unhappy about this, since the caster is too small and very noisy on hard surfaces. It also gets stuck and I had to reverse the driving direction of the rover 180 degrees, since it only worked well when it was in the back.
I also ended up redesigning the back wheels. I replaced them with AndyMark HiGrip wheels. They work really well, have amazing traction and look great.