makerdad
ZoomBox
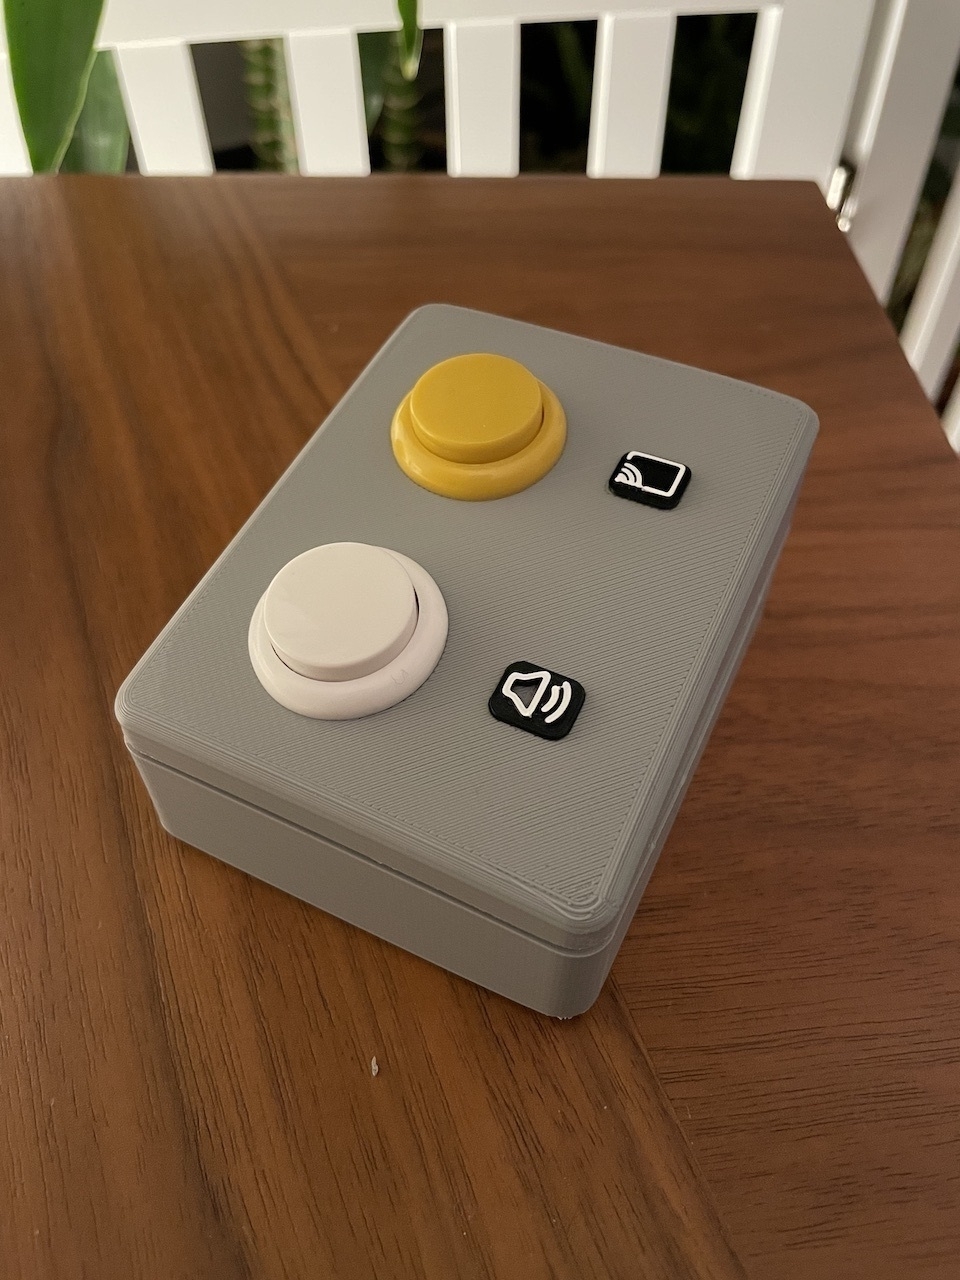
ZoomBox is ready! I designed and printed the top part and fitted the arcade buttons in. I wanted the button icons to be extruded out, which presented a problem. If I extruded them, I couldn’t print the top part upside down. Eventually I decided to print without them and then printed them separately in black filament. Then used a white acrylic pencil to contour the icons. I am pretty happy with the result.
Obviously, using an Arduino UNO for this project is overkill. My research eventually led me to the Arduino Pro Micro, which already has an ATMEGA32u4 in it. This means it’s ready to be used as an HID and all keyboard and mouse control can be done with it.
I will get my hands on some Pro Micros to play with them, but in the meantime this version of the project is a success.
I published all STL models and the Arduino sketch on the ZoomBox Github repo.
Designing with Fusion 360
Despite my initial aversion to it, Autodesk Fusion 360 is truly an amazing tool. The combination of sketching on faces and timeline editing makes it incredibly powerful. Following the great Layer by Layer tutorials form Adafruit I designed a simple case for the ZoomBox. I was able to import the official DXF files from Arduino right into Fusion 360 and map the screw holes exactly.
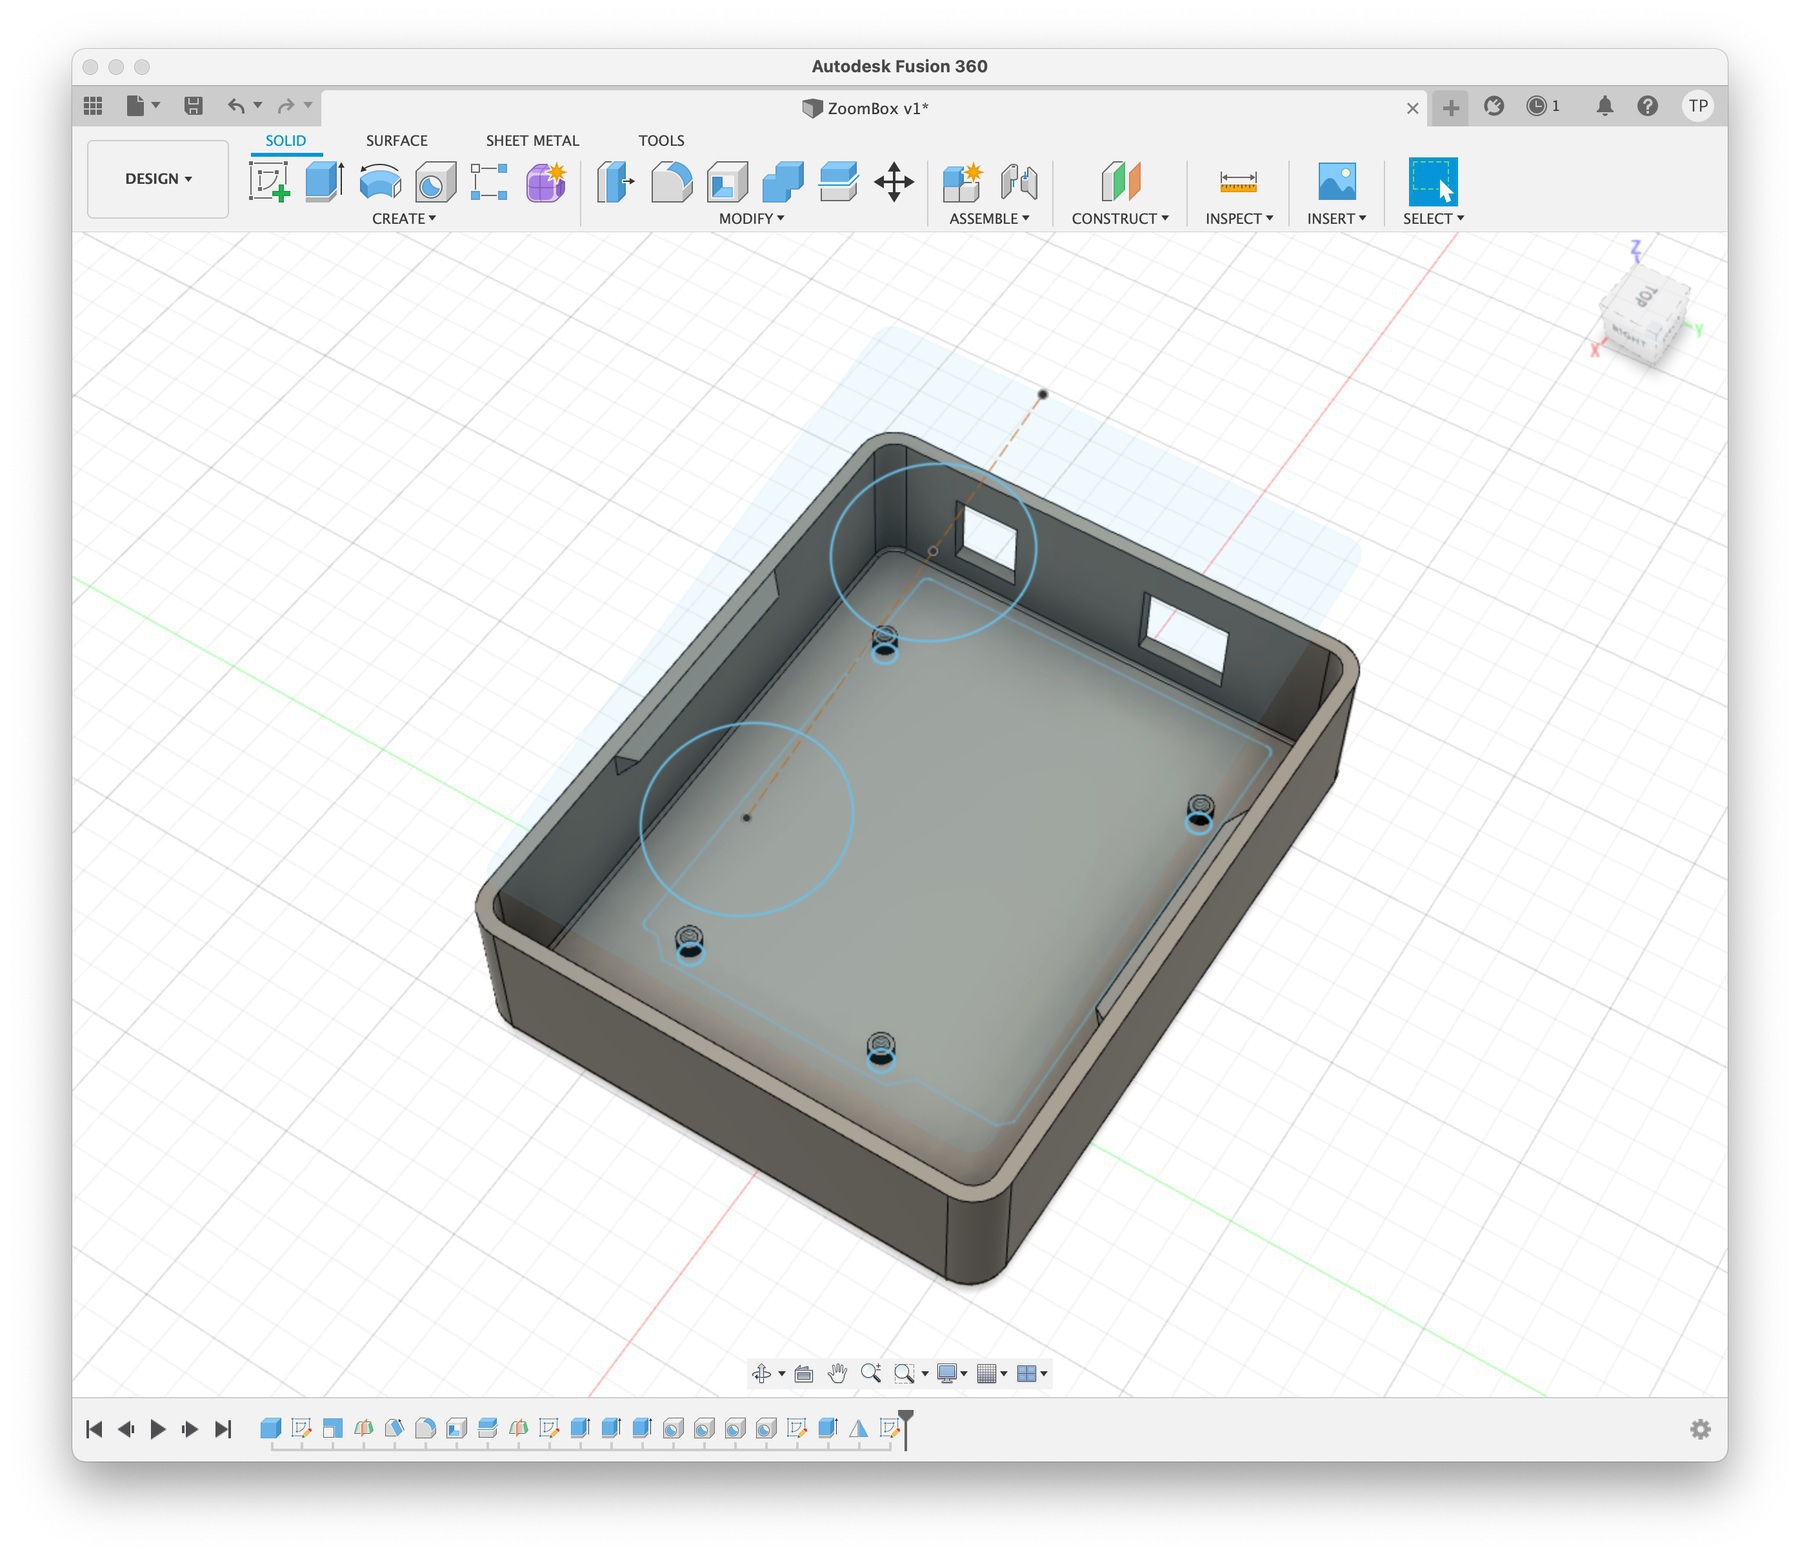
Surprisingly, there was no good information available on component heights. I had to manually measure them. For reference, the USB-A port is 12mm by 11mm and the power jack is 9mm by 11mm. They are respectively 9mm and 4mm inset from the edges of the board. These two drawings were also good references but they didn’t provide all the information I needed:
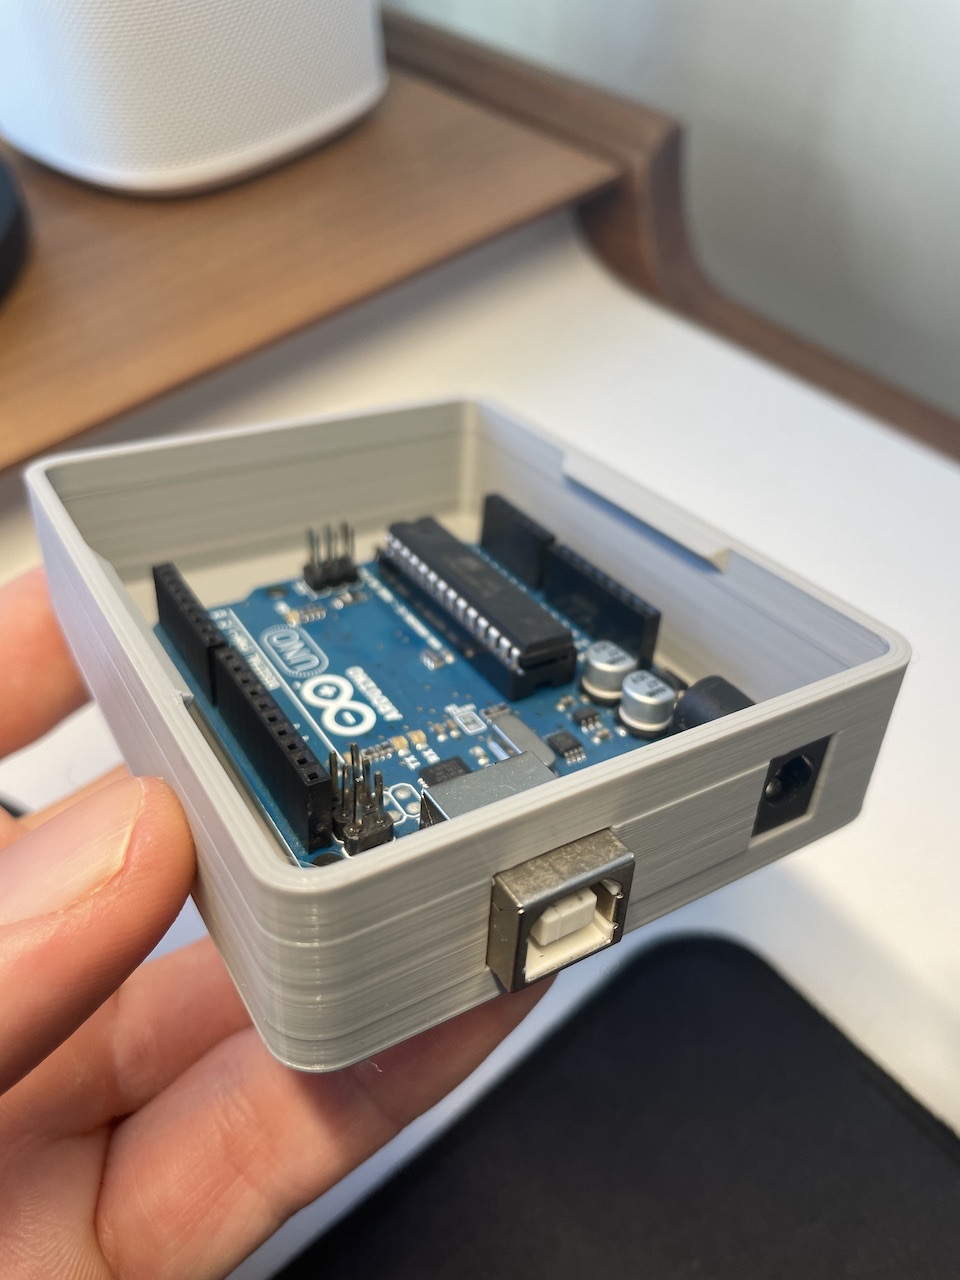
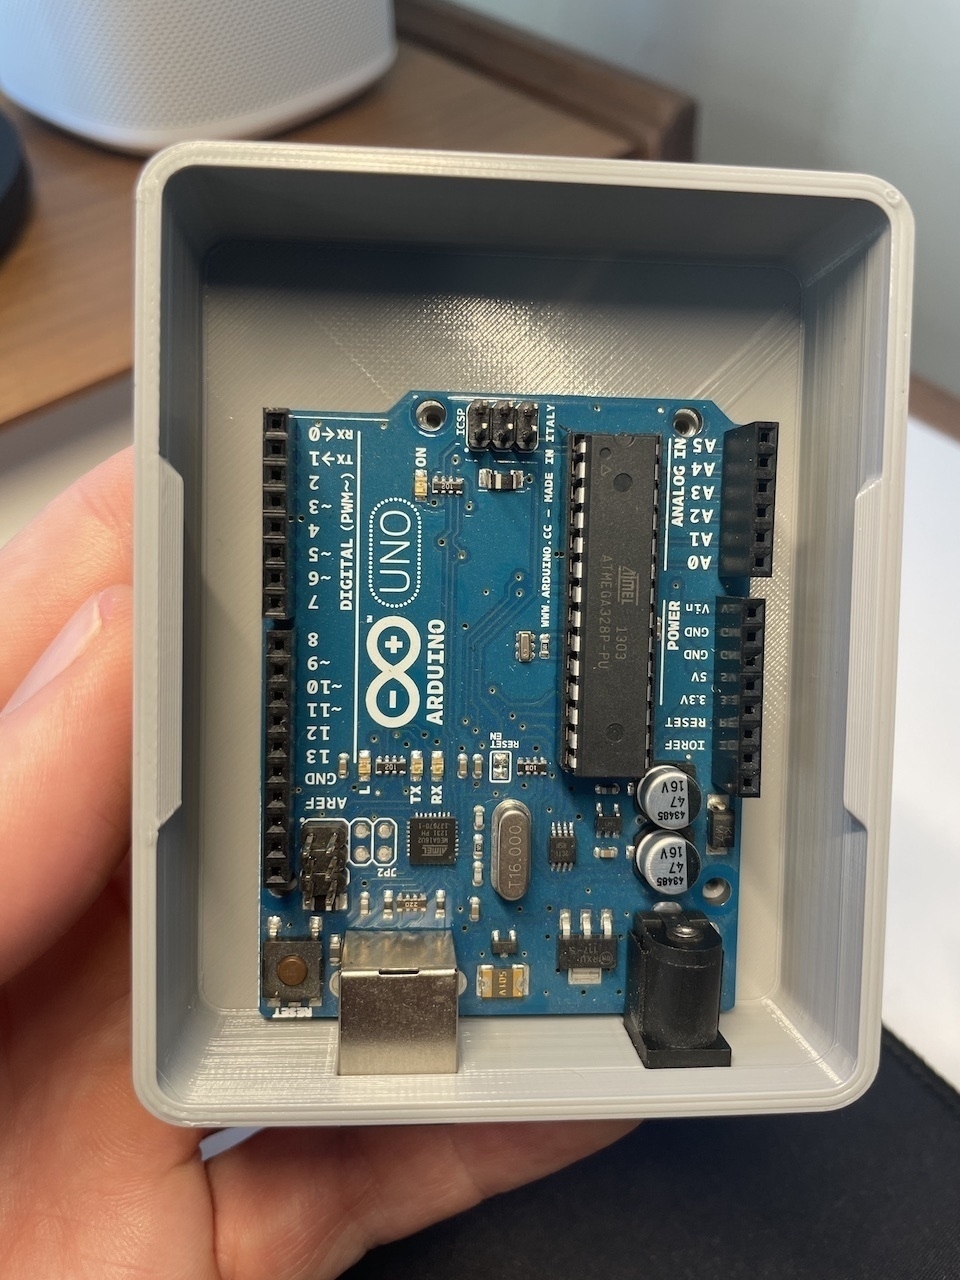
After adding some simple snap fit joints to the bottom part of the box, I sent it to print and went to bed. To my mild surprise, I found a perfectly fitting box in the morning!
Next step: Design the top part with button inserts.
Zoom Mute Controller with Arduino
I had a very informative hacking session tonight and quite a few trips down rabbit holes. I decided to do a little side project: A couple of big hardware buttons that can control Zoom mute/unmute and screen share on/off states on my laptop. I spend most of my days on Zoom and it would be very handy.
Easy, right? Well, it turns out that it’s not that easy.
First thing I did was confirming that Zoom already had global hot keys for the controls I needed. Found them under Settings > Keyboard Shortcuts. Looked good.
Then I did some research on Arduino keyboard controlling. Initial results suggested that the Keyboard library included with the Arduino IDE could easily do this. Great!
Finally I hooked up a couple of big push buttons to an Arduino UNO and spent a bit of time on doing a clean button test implementation. I even got double click and long press actions working thanks to the excellent AceButton library.
It was looking like I was about to wrap this project up. That’s when I tried to compile the whole thing and got a weird error: Keyboard.h doesn’t exist.
My first thought was that something went awry with the IDE included libraries. After some digging, I learned that Keyboard and Mouse libraries are not available for Arduino UNO. Some more digging taught me that this was because ATMEGA328p processor was actually incapable of doing USB communication. So essentially I wasn’t able to have the Arduino Uno or none of the other Nanos or Megas I have at home show up to the computer as a USB HID (Human Interface Device).
Some more research brought me to this article and similar articles and YouTube posts that suggested the bootloader on the Arduino UNO could be swapped with a custom bootloader that would allow USB HID protocol on the ATMEGA328p. I went down several rabbit holes, and even loaded up the official Arduino bootloader using dfu-programmer, following the guide on Arduino.cc.
I was hesitant to upload a custom bootloader on the Arduino. Even though you can’t brick it with this method, none of the tutorials I looked at seemed reputable. They each had their own sketchy Github repos with weirdly named hex file downloads. Also most of the articles were at least 5 years old. Things didn’t seem very promising.
Just as I was getting ready to change tracks – I started considering converting this into a Raspberry Pi Pico project, which I just received in the mail – I came across Hoodloader2. Immediately I could see that this is what I was looking for: A well-maintained, open source project that has been around for years. It came with a very detailed wiki but even then it took me an hour to understand what it was actually doing. This is primarily my fault, because apparently I had no idea how the Arduino UNO boards actually worked.
Here is what I learned: The Arduino UNO prototyping boards actually don’t just contain the ATMEGA328p processor, but also a second processor: the ATMEGA16u2 (older ones have the ATMEGA8u2). ATMEGA16u2 and its siblings are small but powerful microprocessors that have embedded USB HID capabilities. The Arduino UNO board essentially uses this secondary chip to do the USB to Serial translation behind the scenes.
This is where Hoodloader’s genius comes in: It’s a custom bootloader you can load up on the ATMEGA16u2 that allows you to load up Arduino sketches on it! This is the part I didn’t initially understand fully. I thought Hoodloader was going to automatically create a bridge between the ATMEGA328p and the new bootloader, so I could use Keyboard libraries directly from the Arduino UNO side. Apparently this is technically possible, but Hoodloader doesn’t do it. So essentially you build a sketch for the 16u2, use its pins (you can have up to 7 digital pins) and essentially run everything in a little corner of the board. You can still upload a secondary sketch to the main Arduino board, but it’s not necessary.
Armed with this knowledge, and by also leveraging NicoHood’s HID library, I was able to get the keyboard input working fairly quickly. I now have a nice little prototype running that can mute and unmut Zoom. More actions can easily be added.
I also did some more research on the ATMEGA16u2 and its bigger brother, ATMEGA32u4. It’s possible to build fairly simple PCBs that use these microprocessors as the brain. That would be a fun little project, and very handy. I’ll dig into this in the upcoming weeks.